Update :
Some of you reached out to us asking about the 100% "locked" system. We updated our article based on Notion new release.
Notion released a new feature recently (: page-level access (= database row permissions). You can now control exactly who can see each row in a database, which is especially useful for client dashboards for example.
The Pain of Curating Databases in Notion
If you’ve ever tried to consolidate all your tasks into one Notion database—while also sharing select tasks with guests—then you know how frustrating it can be to keep certain items hidden. Most solutions online suggest filters that guests can easily remove or bypass, or they require you to manually share individual pages. Both of these approaches take valuable time and can expose information that shouldn’t be visible to everyone.
Fortunately, there’s a better way: you can create an Advanced Filtered View that locks down filters so they can’t be tampered with. This ensures each guest only sees what they’re meant to see, without you having to manually update page permissions every time. Let’s walk through how to set this up step by step.
Step 1 - Create (or Identify) Your Database
You likely already have a database of tasks created. For this example, let’s assume you have one called DB_Outside-the-Box with two properties:
- Name
- Person

Step 2 - Create an Advanced Filtered View
Don’t settle for a basic filter here! Instead, create an Advanced Filtered View to ensure your guests can’t simply remove or change the filter to see other tasks.
- Go to your View options
- Select Filter
- Click on Add advanced filter
- You should see exactly 1 rule if you’ve set up your advanced filter correctly. In my case, I use a “Name is empty” filter to hide everything in my main database, since every task actually has a name. As a result, no items will show up for anyone without further customization.
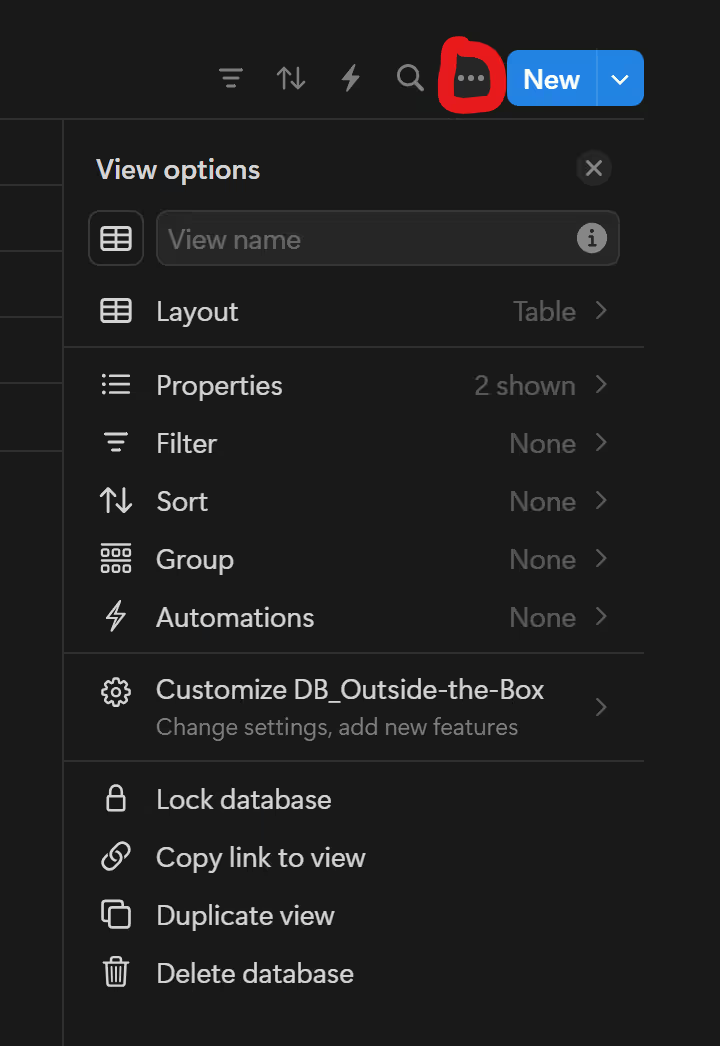
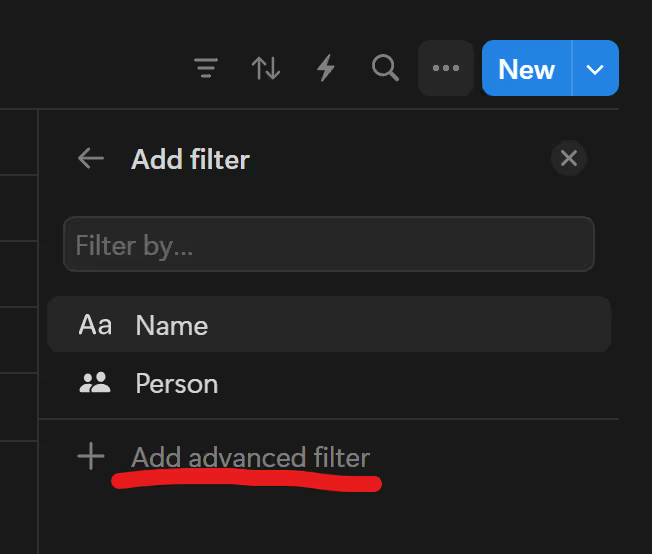

Why go advanced? Because a simple filter is easily overridden, giving your guests the ability to see data they shouldn’t. An advanced filter is locked and can’t be casually changed by non-owners, keeping your sensitive tasks out of sight.
Step 3 – Invite Your Guest
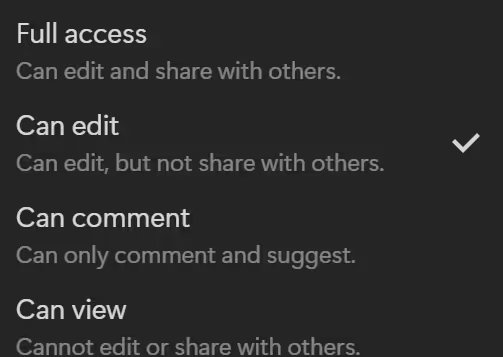
Next, share your database with your guest(s) by giving them Can Edit Content access. This allows them to interact with the database without giving them permission to remove or alter certain filters.


Step 4 - Create your Guest Dashboard
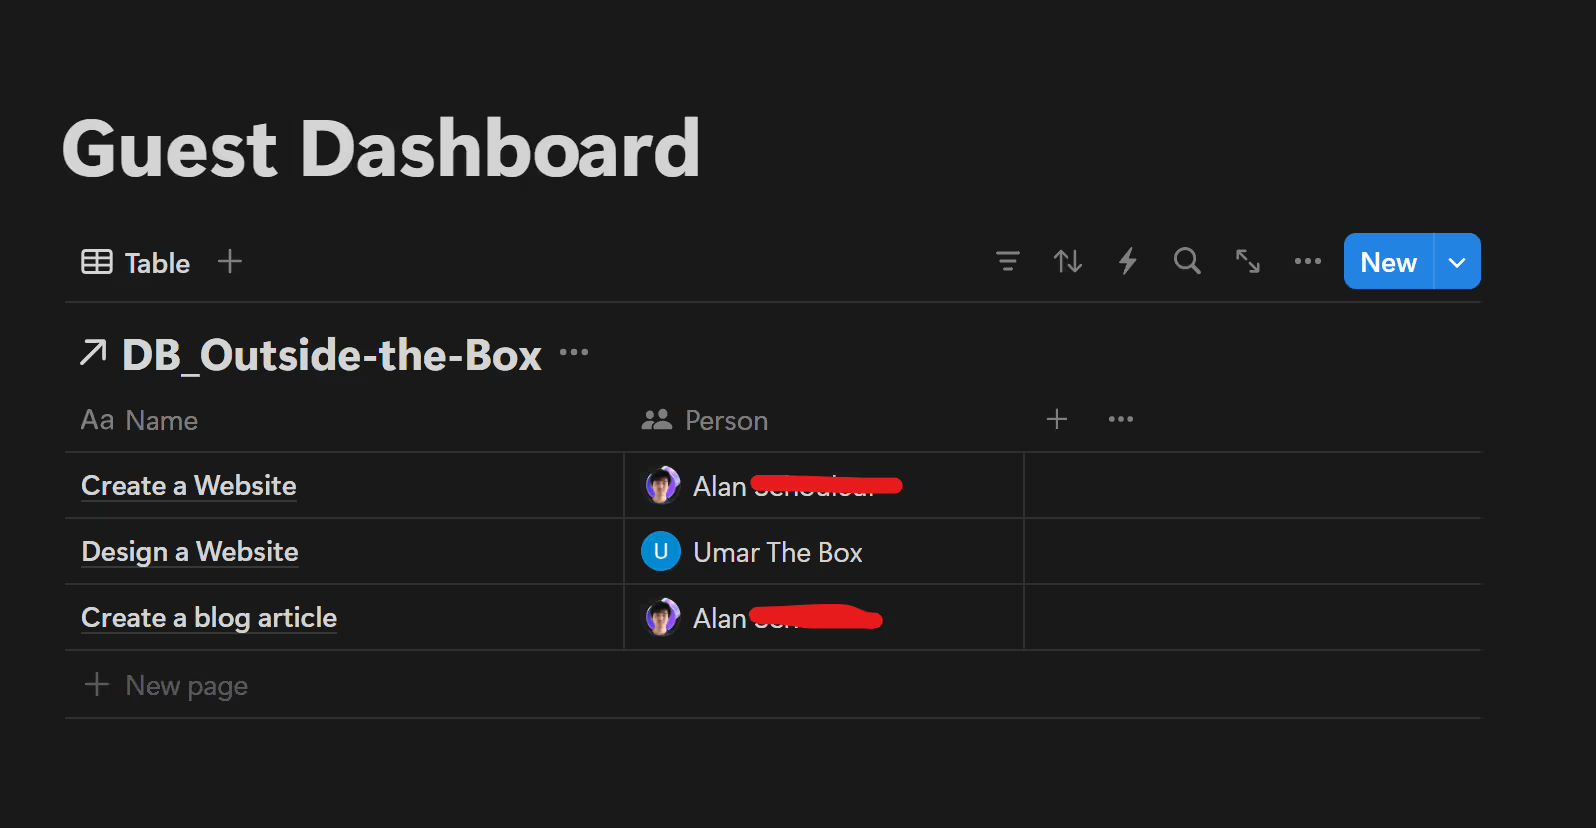
Now that your database is configured, it’s time to create a Guest Dashboard—a page or dashboard where your guest will actually interact with the DB_Outside-the-Box. Here’s how:
- Open (or create) a new page in Notion, which will serve as your Guest Dashboard.
- Add a linked database:
- Type
/linkedand select Create linked database. - Search for and select DB_Outside-the-Box.
- Type
- Confirm that it’s in an unfiltered view to start—just so you have a clear baseline.
Step 5 - Create the Advanced Filter View on the Guest Dashbaord
Next, you’ll apply the advanced filter on the guest’s dashboard so they only see tasks relevant to them.
- Go to the View options in your new linked database.
- Select Filter.
- Click on Add advanced filter.
- Choose your actual filter criteria. For example, you might filter by
Person=[Guest's Name], ensuring they only see tasks assigned to them.

Step 5.BIS – Row Permission (UPDATE FROM NOTION)
In order to keep 100% security, add your client to the row they should have access to. Don't share the FULL DATABASE with the step 6, just do it by selecting the according element (might be time consuming).
Step 6 – Invite Your Guest (Again)
This time, you can only invite it on Edit mode.
STEP 7 - Lock the View
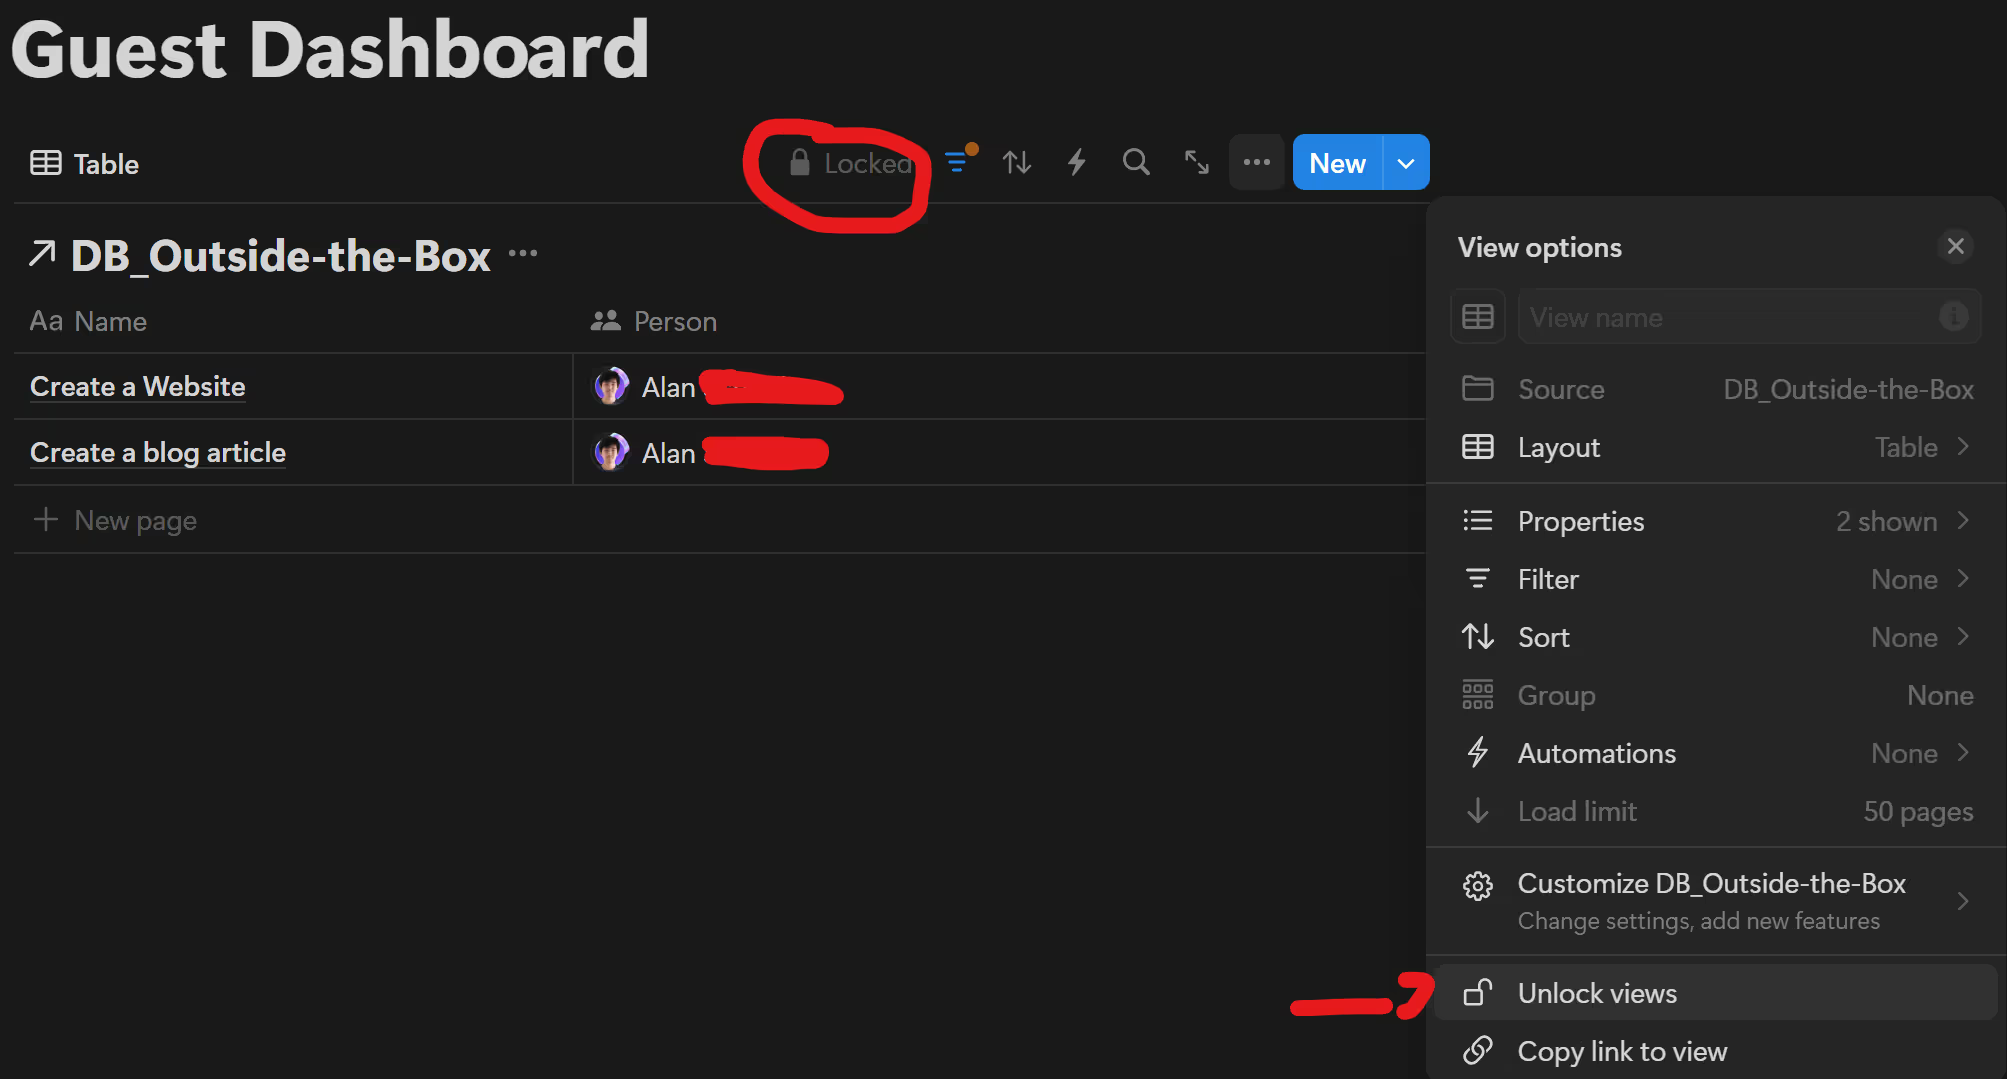
This step is crucial—it prevents your guests from seeing or changing the rules you’ve set, which keeps them from viewing tasks they shouldn’t.
- After applying your advanced filter, click the three-dot menu (• • •) in the top right corner of your database view.
- Select Lock View.
By locking the view, you ensure that only you (or other admins) can modify the filter settings. Your guest will be able to see and edit only their assigned tasks, without the option to adjust advanced filters.
Step 8 – Create a Master Dashboard for Yourself
Now that your guests have their own locked-down views, you can create a dashboard for yourself to see all tasks across every client and guest—no filtering limitations required.
- Create a new page in Notion.
- Link your master database by typing
/linkedand choosing Create linked database. - Customize the view to fit your workflow—sort by priority, due dates, or client names to quickly get an overview of everything.
Final Checks
PS: Always triple-check your permissions and filters to ensure no confidential information is inadvertently accessible. I may have missed a detail, so it’s best to do a quick quality check to confirm everything is locked down properly.
I hope this guide saves you the hours of struggle I went through!
If you found it helpful, feel free to connect with me on LinkedIn for more tips and tricks.
BTW : We are working as Notion Official Partner ! Contact us if you want more info :D


